Key Challenges in Installing Natural Stone for Modern Construction Projects
 ARDEX ENDURA
 13 Mar 2026
 05 Min
Natural stone has long been admired for its timeless appeal. Materials such as marble, granite, limestone, sandstone and travertine continue to define luxury spaces. Their natural textures and unique veining make every installation visually distinctive.
However, unlike tiles, natural stone behaves very differently. It is heavier, more porous and more sensitive to moisture and movement. Natural stone demands specialised tile adhesives, compatible grouts, effective waterproofing and well-prepared substrates. When these elements come together, durability improves significantly.
At Ardex Endura, we provide advanced installation systems that handle the unique physics of natural stone, ensuring your surfaces remain beautiful for decades.
Why Natural Stone Installation Is More Complex Than Regular Tiling?
Natural stone is inherently porous; thus, it absorbs moisture readily. If moisture is not controlled, staining and bond weakening can occur. In addition, natural stone is much heavier than regular tiles. Thickness variations are common, even within the same batch, making alignment during installation more difficult.
Natural stone also expands and contracts with temperature changes, and if proper allowances are not made, stress can slowly build up within the system.
Surface finishes also matter. Polished stones react differently compared to honed or textured finishes.
Challenge 1 – Substrate Preparation & Surface Irregularities
One of the most common problems in stone installation begins beneath the surface. Uneven substrates create lippage, stress points and eventual cracking. Hollow sounds are also frequent when proper levelling is ignored.
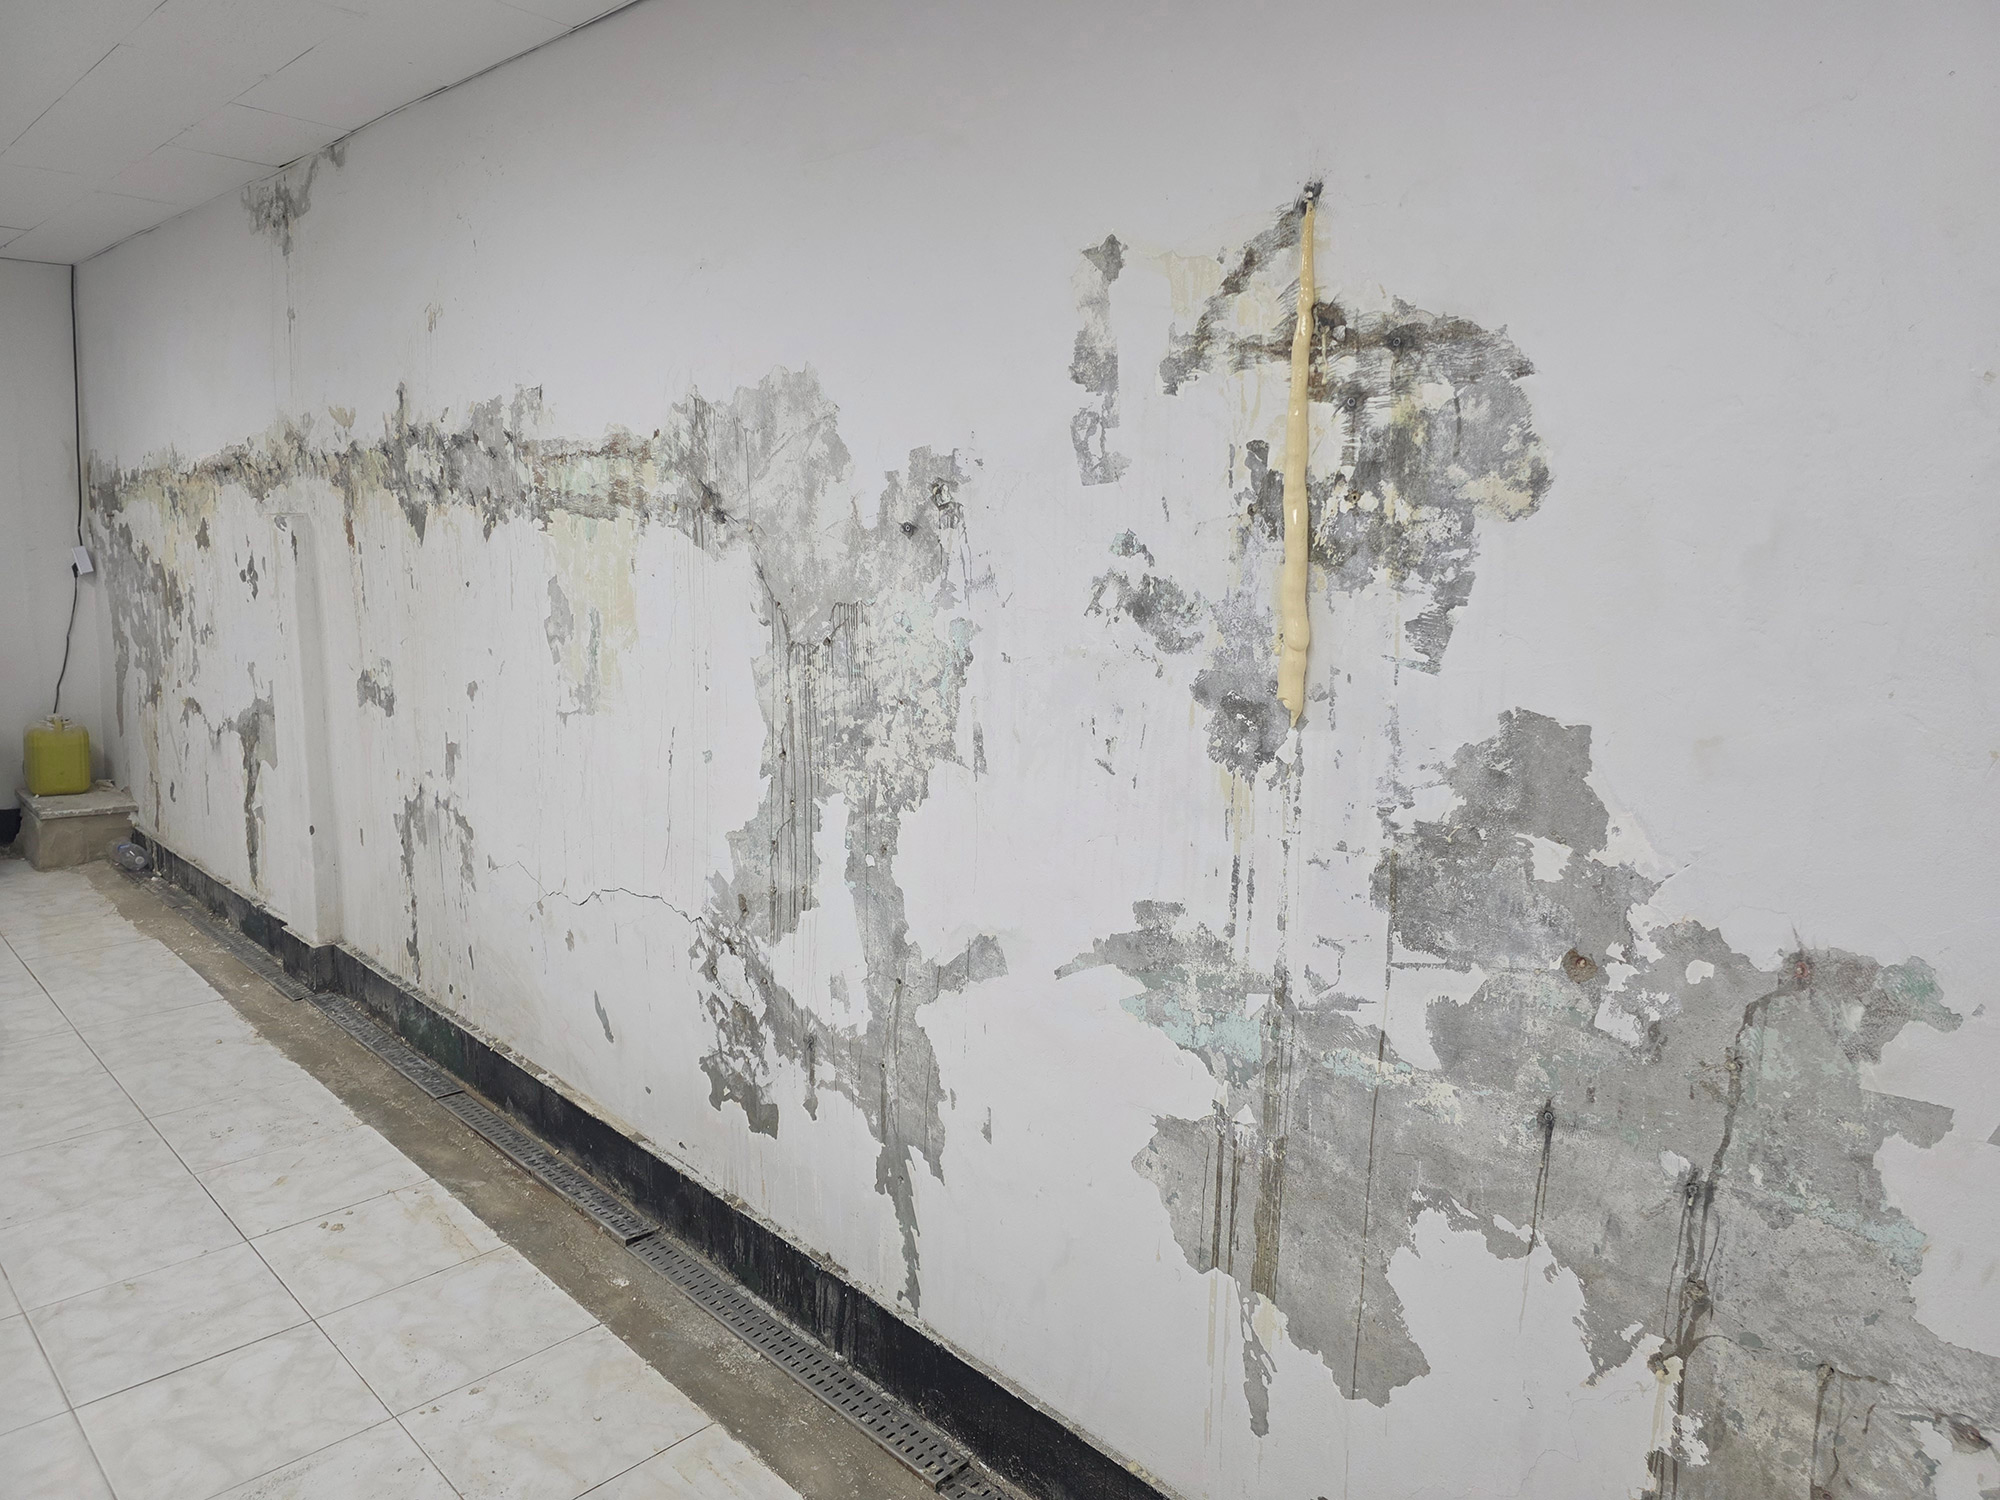
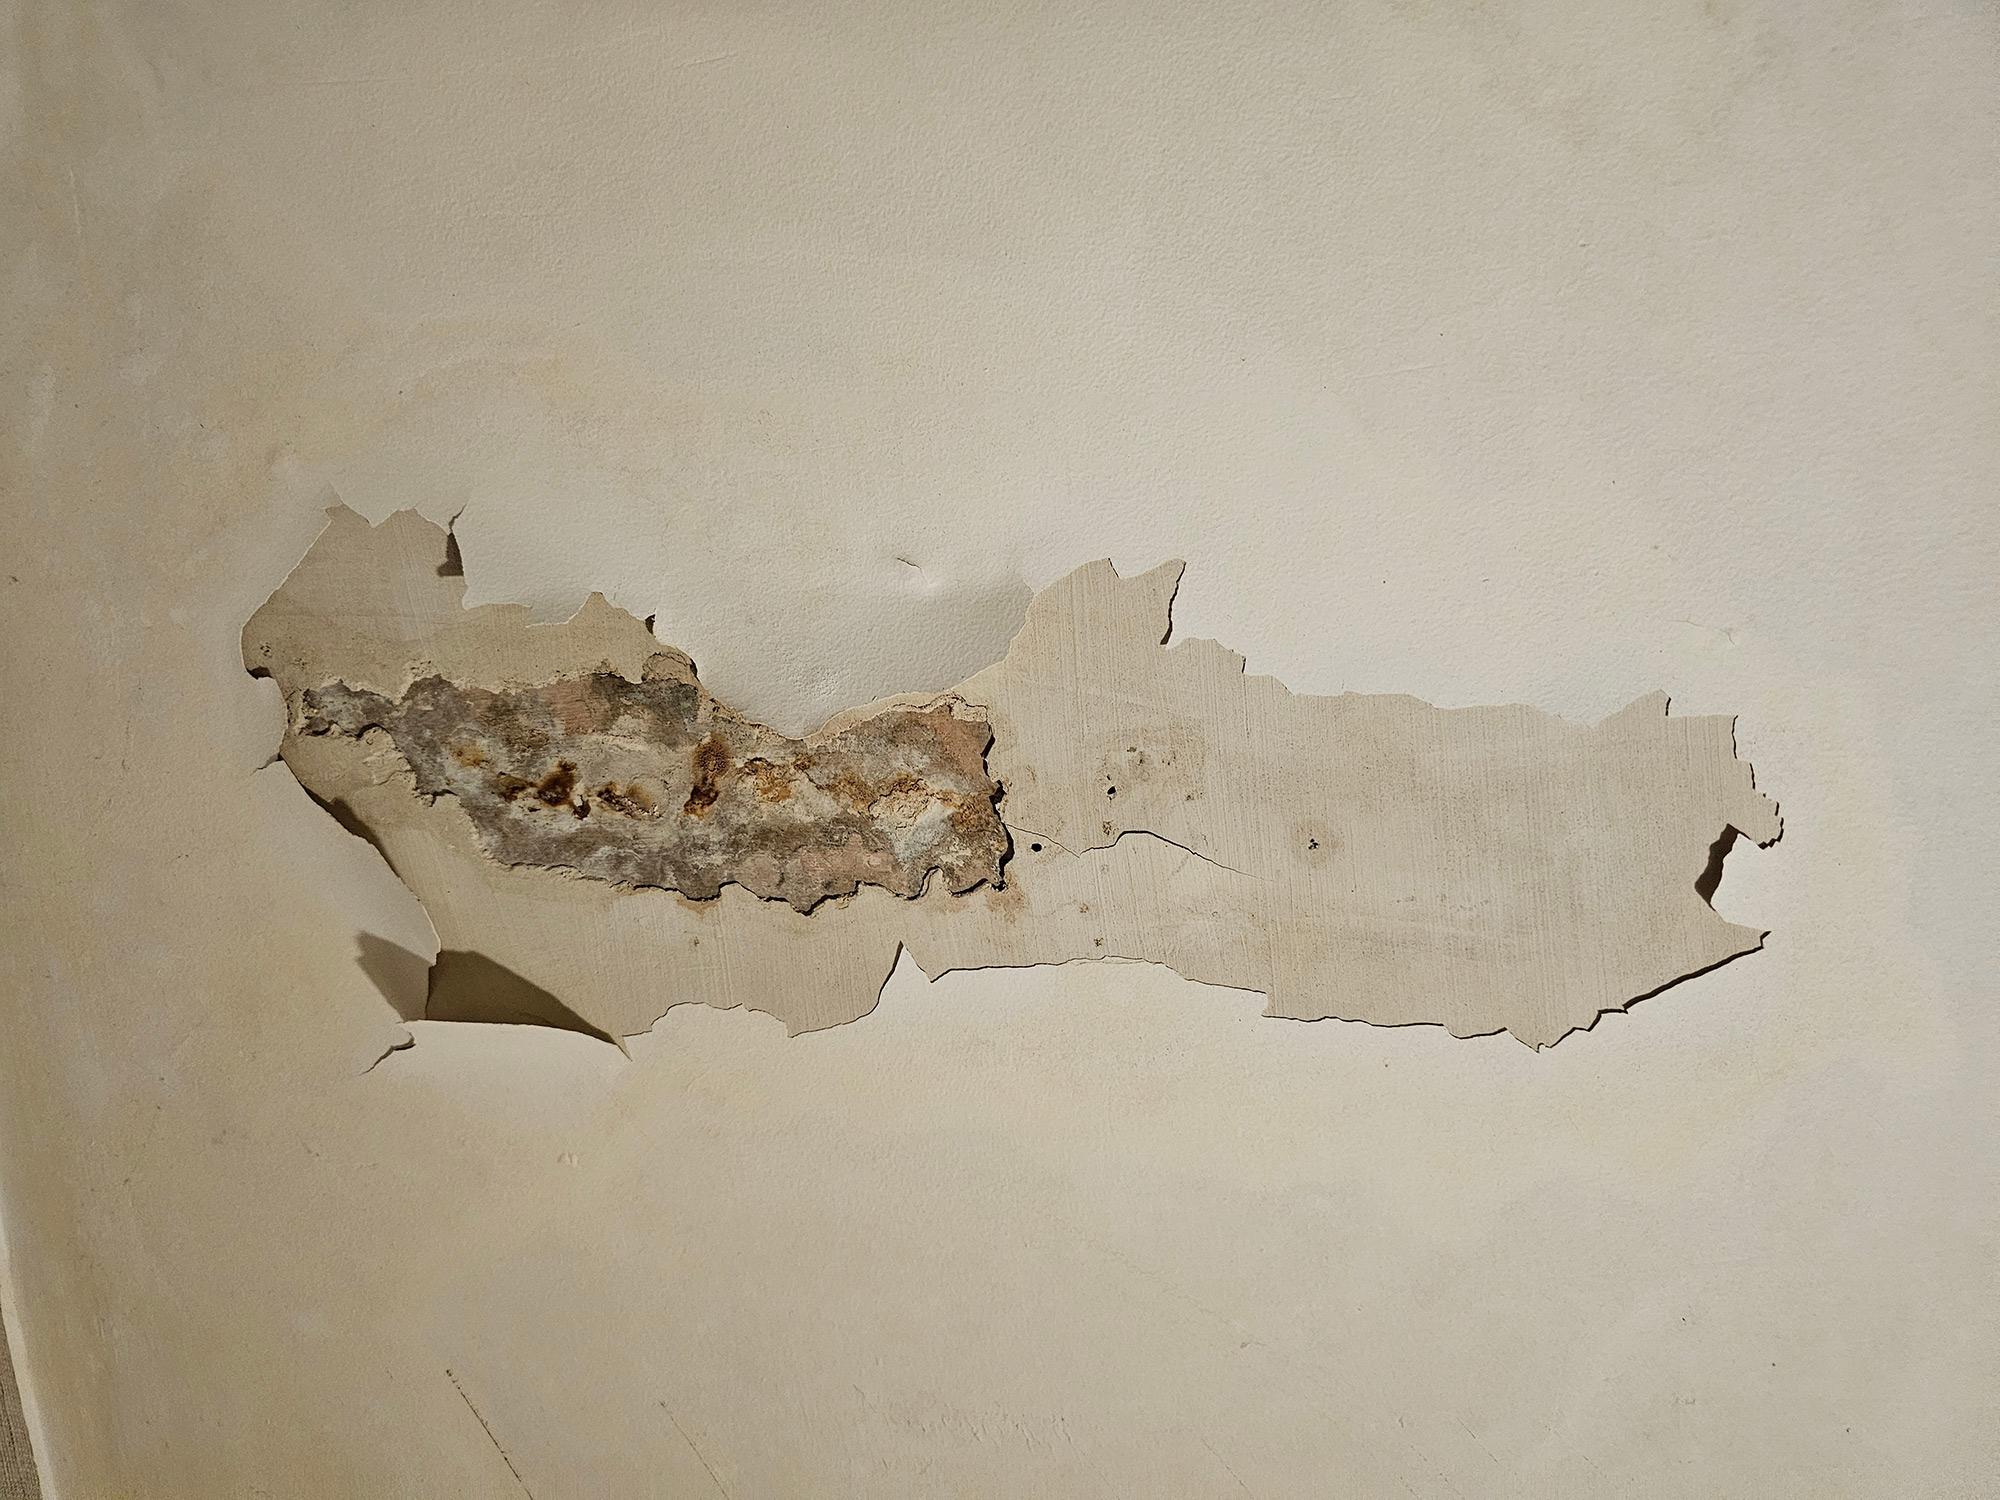
Additionally, moisture trapped in the substrate directly affects stone adhesion. Stones may discolour or detach over time, making surface preparation a non-negotiable step.
Self-levelling compounds, such as Cementitious Flooring Solutions, help create flat, uniform surfaces before stone laying begins. When done correctly, they improve bonding performance and reduce installation failures.
Challenge 2 – Selecting the Right Adhesive for Heavy Stone
Natural stone weighs significantly more than ceramic tiles. As a result, standard stone adhesives often fail under load. Slippage on vertical surfaces is another issue, especially with large stone formats, making high-bond strength critical.
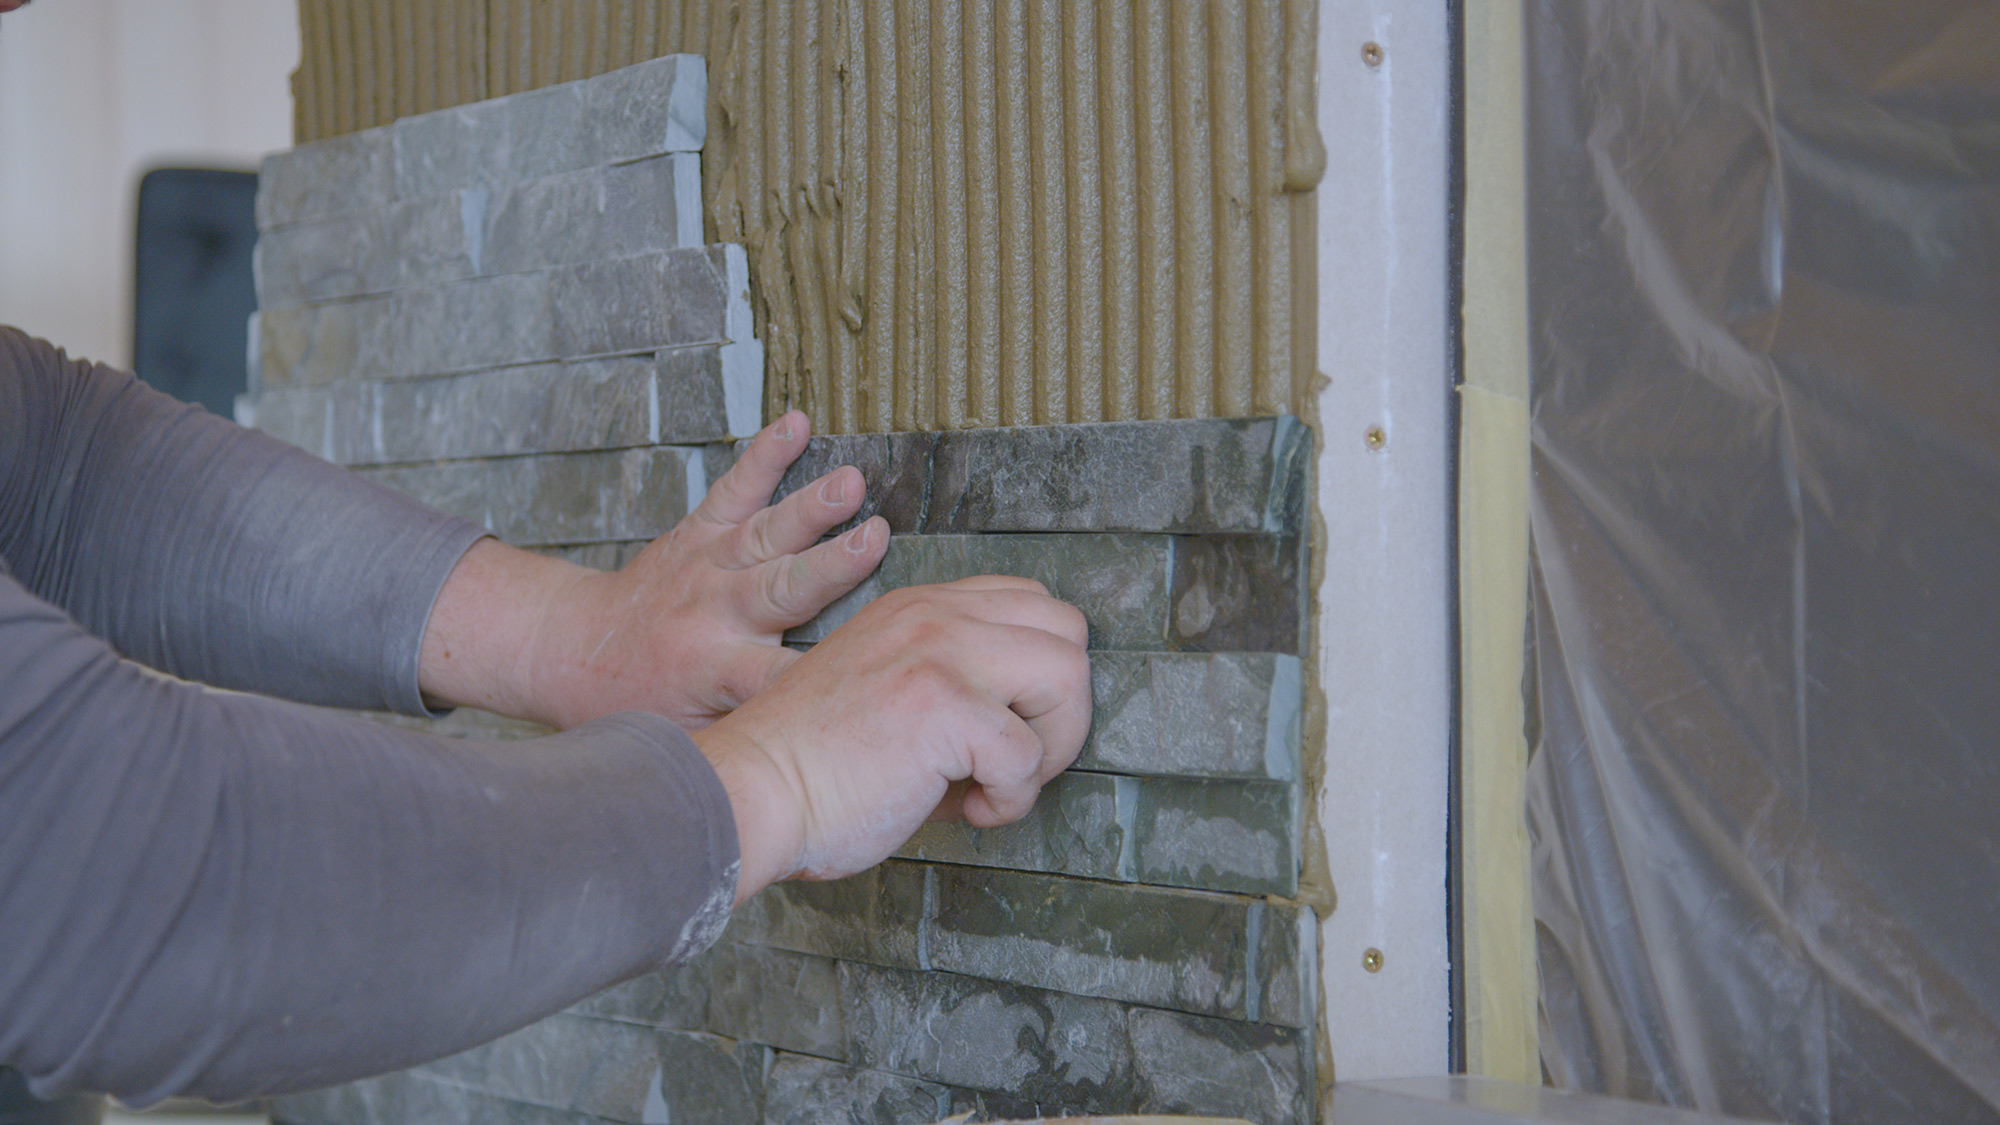
Polymer-modified Tile & Stone Adhesives like White Star and Silver Star Plus deliver high bond strength and controlled slip, ensuring heavy stone stays in place during installation.
Choosing from these best tile adhesives improves safety, alignment and durability throughout the installation.
Challenge 3 – Managing Moisture & Staining Risks
Light-coloured stones, particularly white marble, are prone to shadowing or staining if they absorb water from the tile adhesive. Moisture in the substrate can also lead to efflorescence - the white powdery deposits that ruin the stone’s appearance. In wet areas such as bathrooms and balconies, these risks increase further.
This makes waterproofing essential before installation begins. Using compatible stone adhesives and waterproofing systems prevents moisture ingress. This way, the stone retains its appearance and the bond remains intact in the long run.
Challenge 4 – Controlling Lippage in Large Stone Slabs
Natural stone slabs rarely have uniform thickness. When combined with large slab sizes, alignment becomes more challenging. Even slight variations can result in visible lippage.
The back-buttering technique helps compensate for these differences, ensuring full adhesive coverage beneath the stone. This reduces voids and stress concentration points.
Levelling systems further help keep slabs flat. When used alongside the best tile adhesive, they significantly improve finish quality and walking comfort.
Challenge 5 – Grouting & Joint Movement Issues
Natural stone expands and contracts with changes in temperature and environmental conditions. When joint spacing is incorrect, this movement has nowhere to go, often leading to cracks or grout failure.
Choosing the right Tile Joint Grout, based on joint width and site conditions, helps accommodate this movement while maintaining strength.
Options like Cement Polymer Grout work well for standard joint sizes and help absorb minor movement, while Epoxy Grout is best suited for narrow to medium joints and offers excellent stain resistance in demanding areas. For wider gaps, Wide Joint Grout provides the flexibility and strength needed to accommodate movement.
Regardless of the grout type, avoiding overwatering during mixing is also critical as excess water weakens the polymer structure, leading to pinholes and structural failure.
Challenge 6 – Long-Term Maintenance & Durability
The longevity of a natural stone installation depends on how well it is installed and maintained. Poor installation practices or incompatible materials can weaken the system, leading to cracked joints, loose tiles and frequent repairs.
Using the right combination of stone adhesive and grout is the only way to extend the surface's lifespan, as these components work together to absorb structural stress and prolong the installation's lifespan.
To protect this investment, clean your natural stone with stone-safe products and avoid harsh chemicals.
Best Practices for Successful Natural Stone Installation
Ensure Proper Surface Levelling
Before installing the stone, ensure the surface is completely level. Filling low spots and smoothing high areas helps avoid lippage and cracking, ensuring the stone bonds well.
Use Stone-Compatible Adhesives
Regular tile and stone adhesives can sometimes let minerals seep into stone, causing unwanted stains. Using stone adhesives specifically formulated for natural stone helps preserve its natural look and ensures a strong, long-lasting bond.
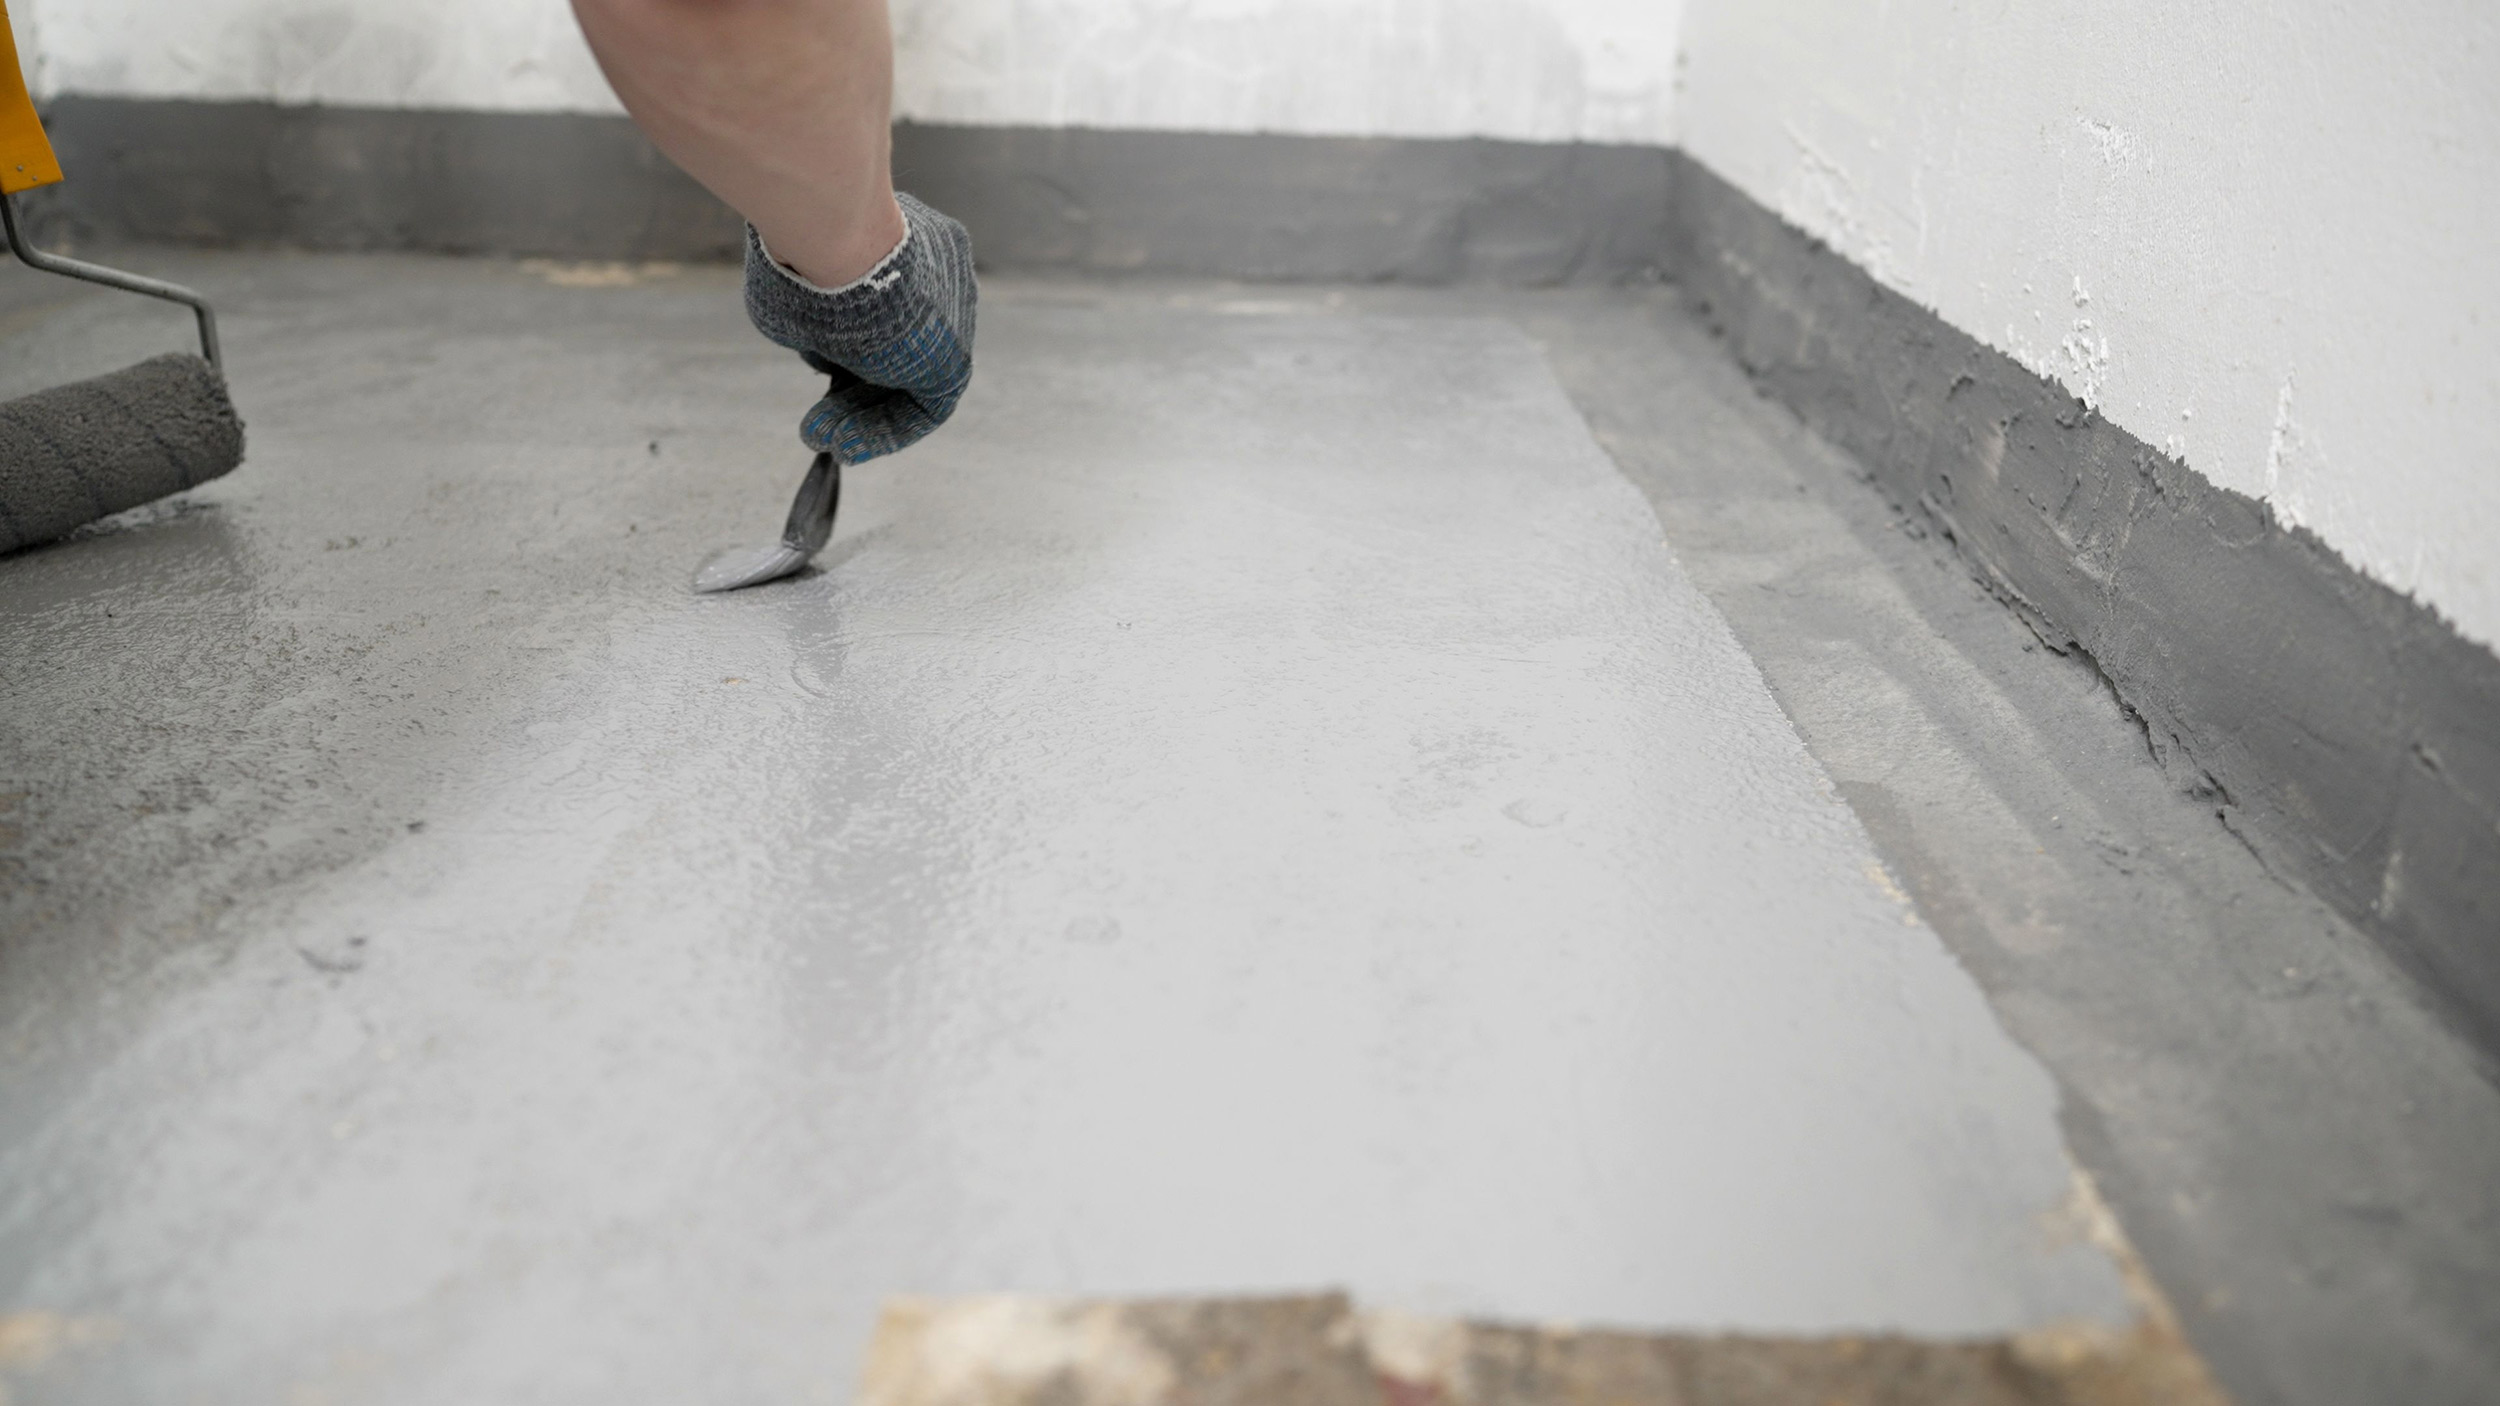
Apply Waterproofing Where Required
For installations in high-moisture areas, a waterproofing membrane is essential. It prevents water migration, mitigating the risks of mould, mildew and substrate failure.
Maintain Proper Joint Width
Consistent joint spacing allows for the stone's natural expansion and contraction. Place spacers at each corner as you lay the stone to maintain consistent spacing throughout.
Follow Manufacturer Mixing Guidelines
Always mix stone adhesives and grouts exactly as the manufacturer recommends to develop their intended strength and prevent weak bonds or brittle joints.
Final Thoughts
Natural stone brings a sense of timeless elegance to any space, but achieving a durable finish requires good design choices. Most on-site failures occur when the science behind natural stone installation is overlooked, leading to common problems such as cracking, staining or debonding over time.
By selecting the best tile adhesive, compatible grout and reliable flooring solutions, these issues can be effectively avoided.
Check out Ardex Endura’s high-performance installation systems, engineered to meet the real-world demands of stone projects.